Microsoft Teams is a fantastic program for engaging with students both synchronously and asynchronously, allowing for chatting, video & audio calls, and even sharing presentations with students while on a call. However, because of the many features it has, it can be a bit intimidating to get started with. Below are guides on the basics: starting a 1-on-1 chat, and starting a classroom Team for group or singular at distance instruction.
Teams Chat
Using Teams to chat or video call with a student 1-on-1 is simple, and a useful way to connect with a student if they are out of town but still need assistance with office hours or have some other mitigating factor that doesn’t allow them to meet in person. Below is a guide on how to start up a chat with a student.
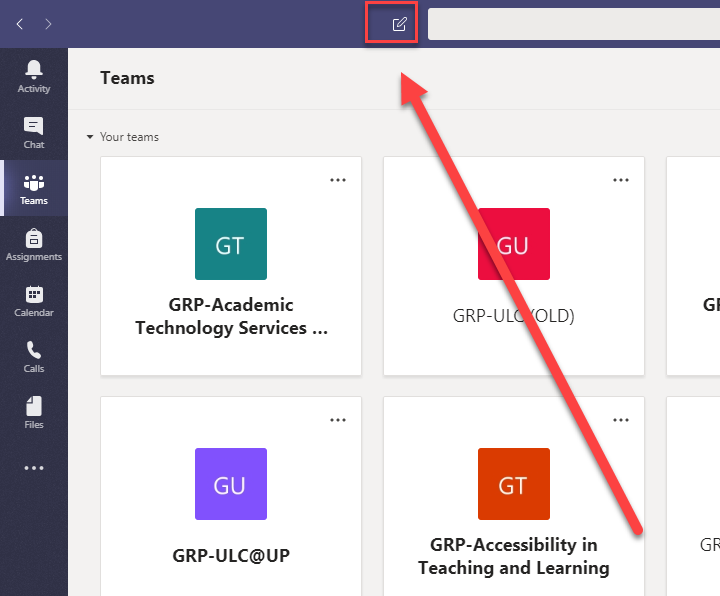
Click on the “New Message” button to the left of the search bar, at the top of the screen – it looks like a notepad or message pad with a pen on it.
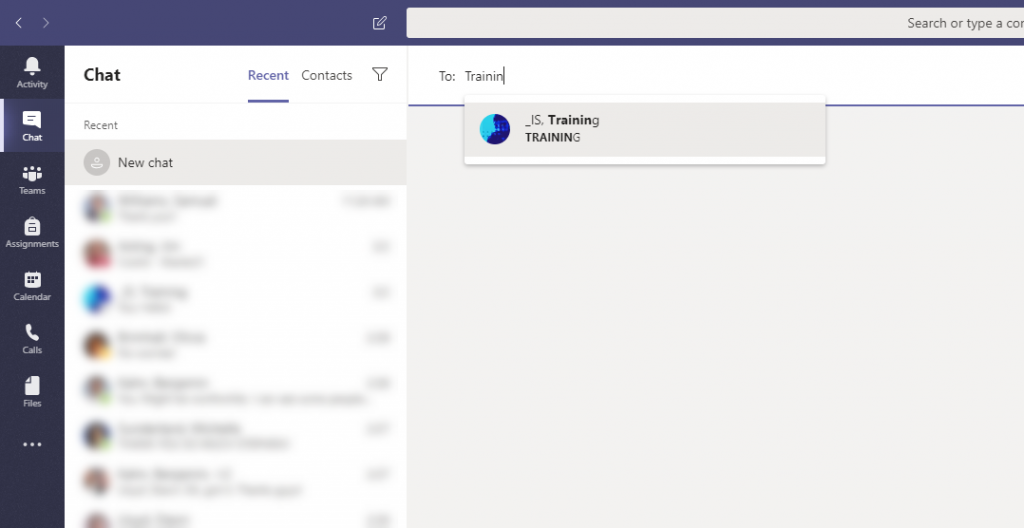
Start typing the name or email of the student you want to chat with. Since Teams has access to UP’s directory, it should display a list of possible students, faculty, and staff accounts you can add.
Press enter or click on the user’s name to open a chat with them. You can continue to add users, or just hit “Enter” to confirm and start chat.

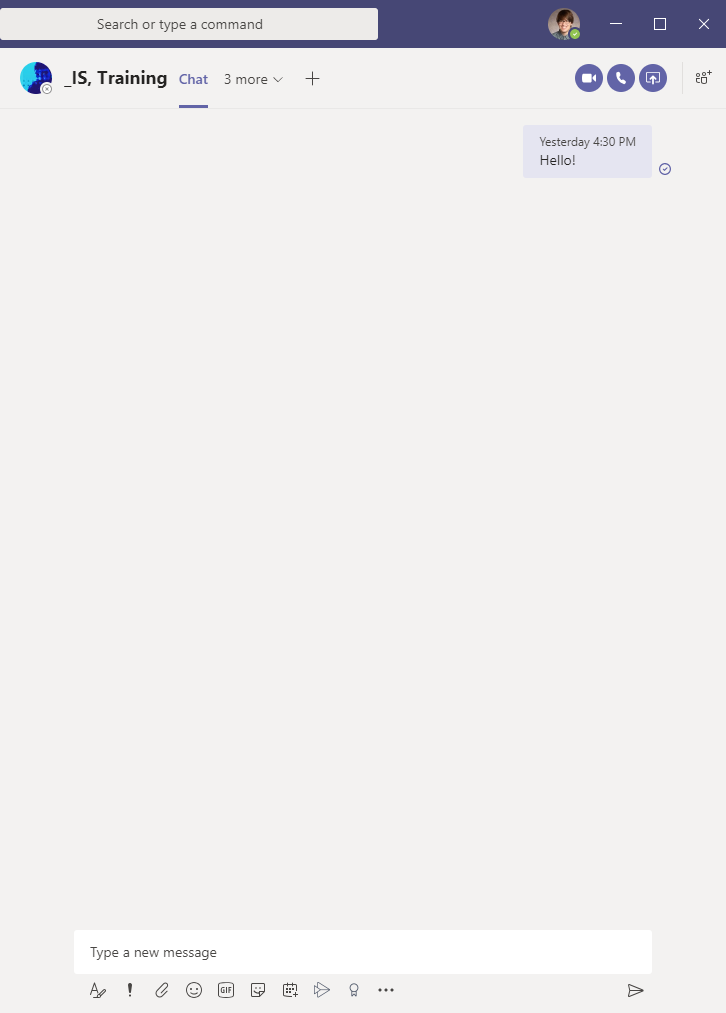
You can use the three buttons in the top left to start a video (the camera), audio (the phone), or screenshare (the screen) call.

You can also chat using text or upload files to share with the user using the chat bar below.
Creating a Class Team
NOTE: The video above leaves out the step of going to manage team->pending requests to approve students who click on the join link. These instructions are spelled out below and necessary for letting students join the Team you create.
Creating a Team for your entire class is a process that gives you a living space where you can chat with your students and foster discussion among the class. You can also host a video call with all of the students and have a synchronous lecture or class discussion.
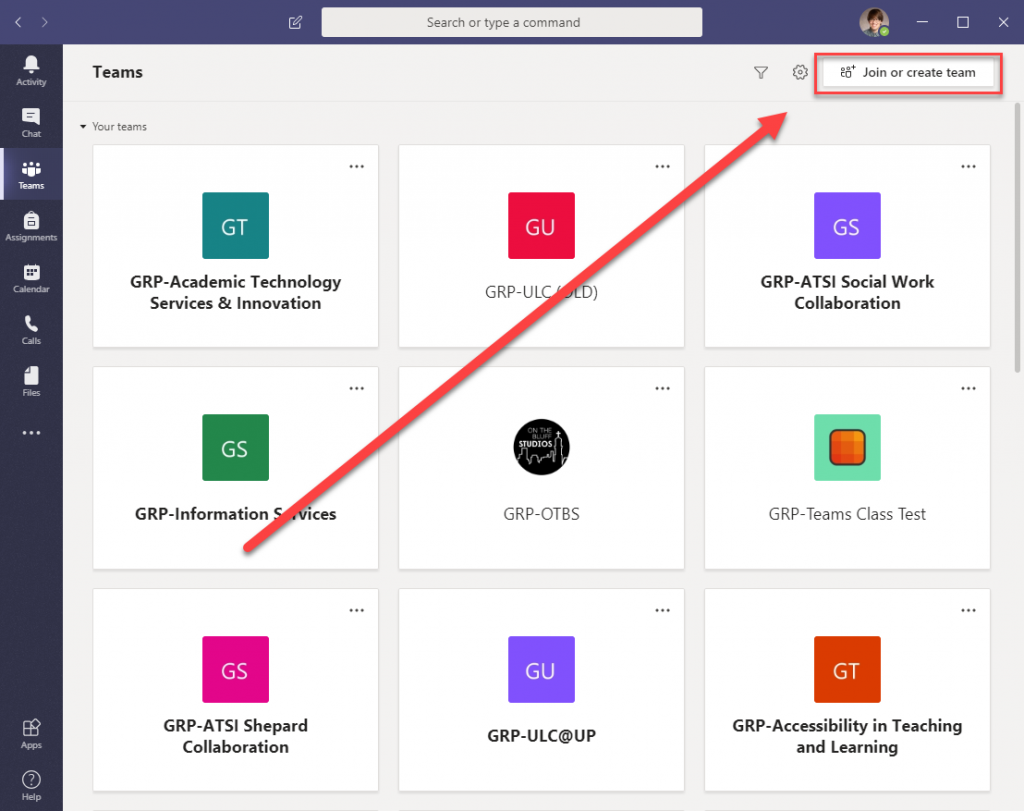
Head to the “Teams” tab and click on “Join or create team”.
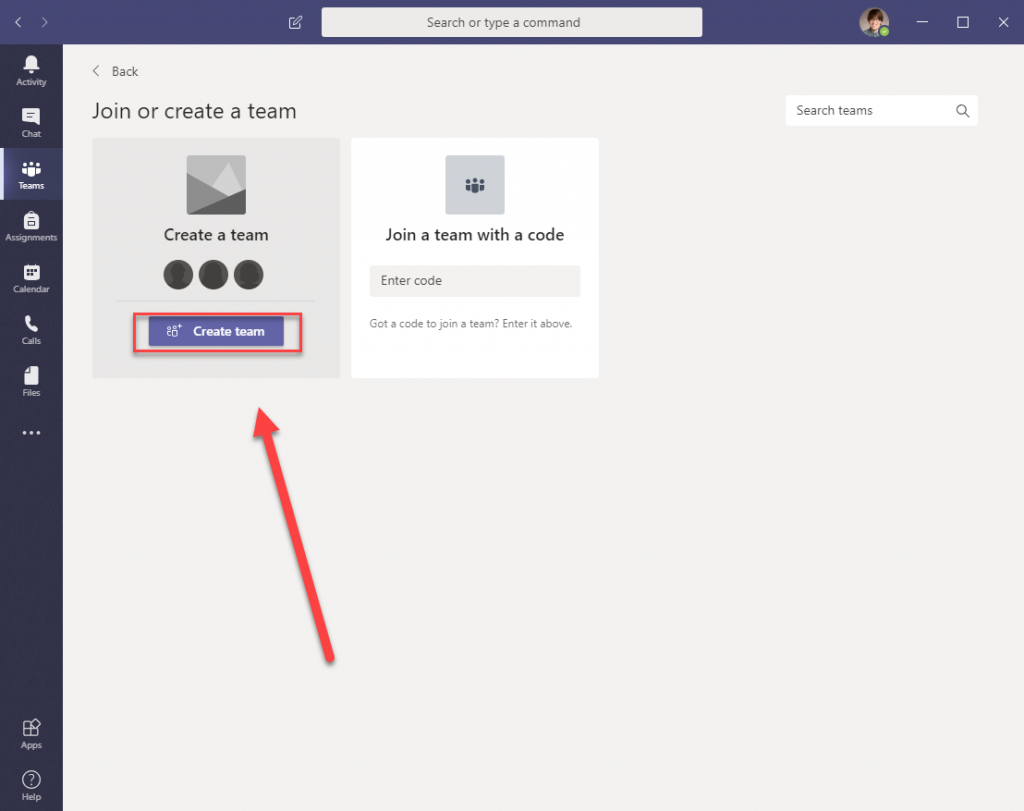
Then, click on the “Create team” button on the next page.
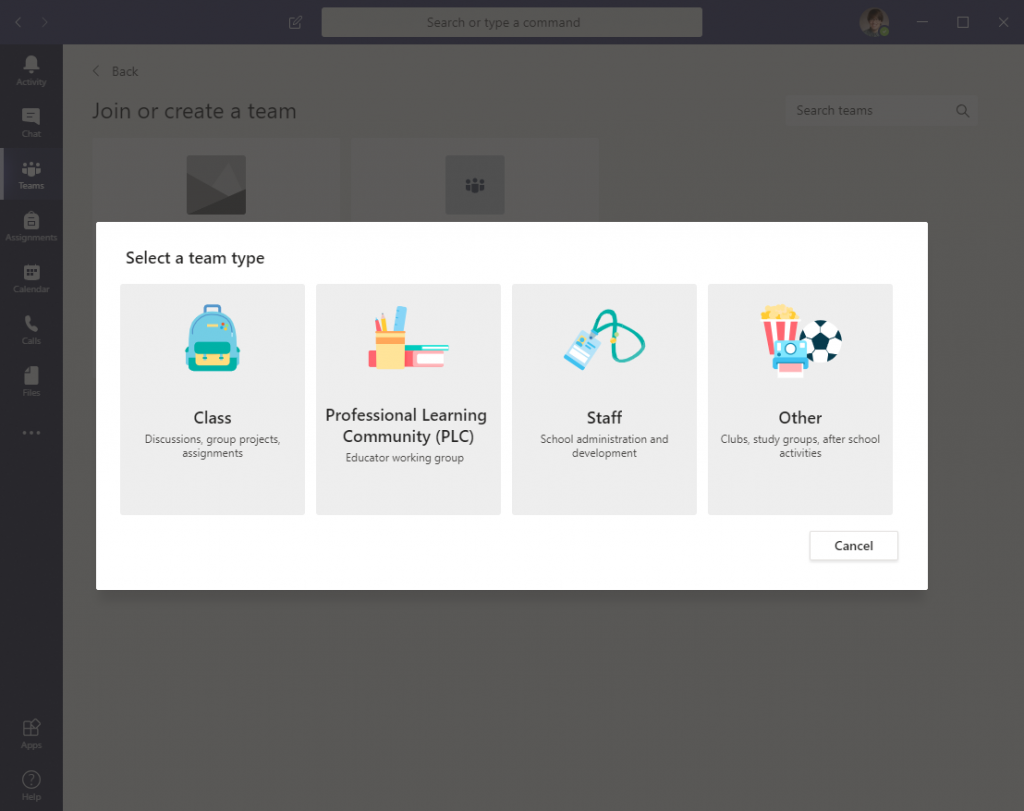
A selection of Teams types will pop up. Most of them are very similar to each other, but each of them comes pre-loaded with certain activities that may be relevant to your needs. I’ll be using the “Class” version for the rest of this guide.
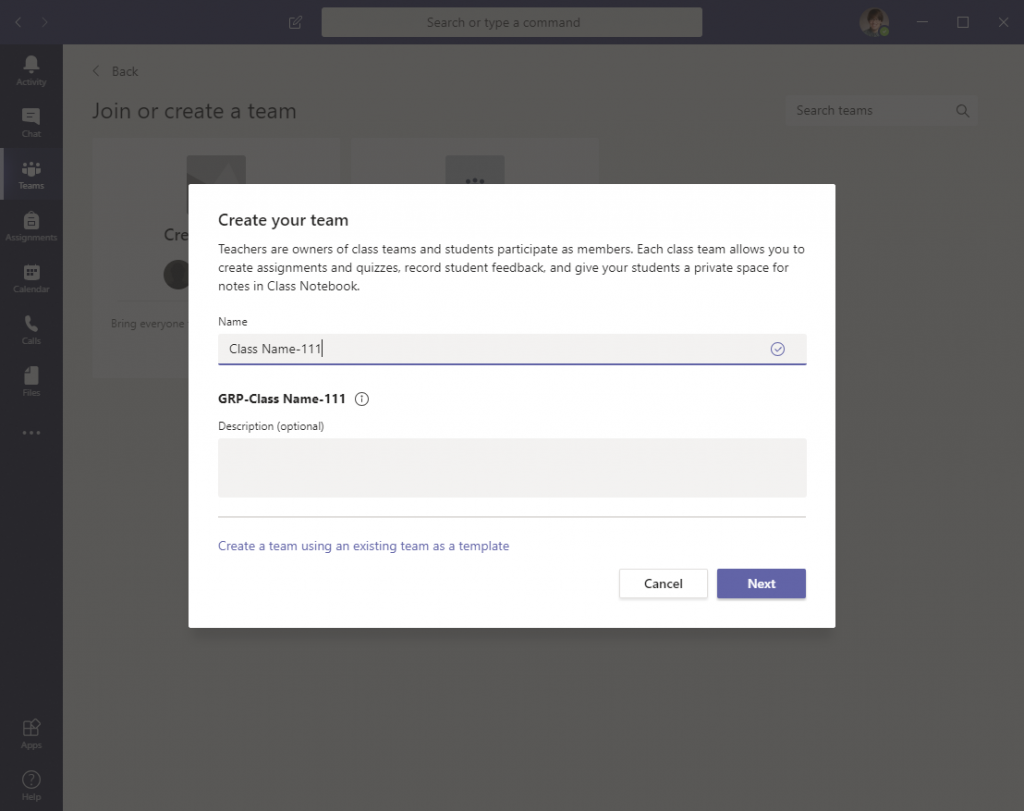
Give your team a name and, optionally, a description.
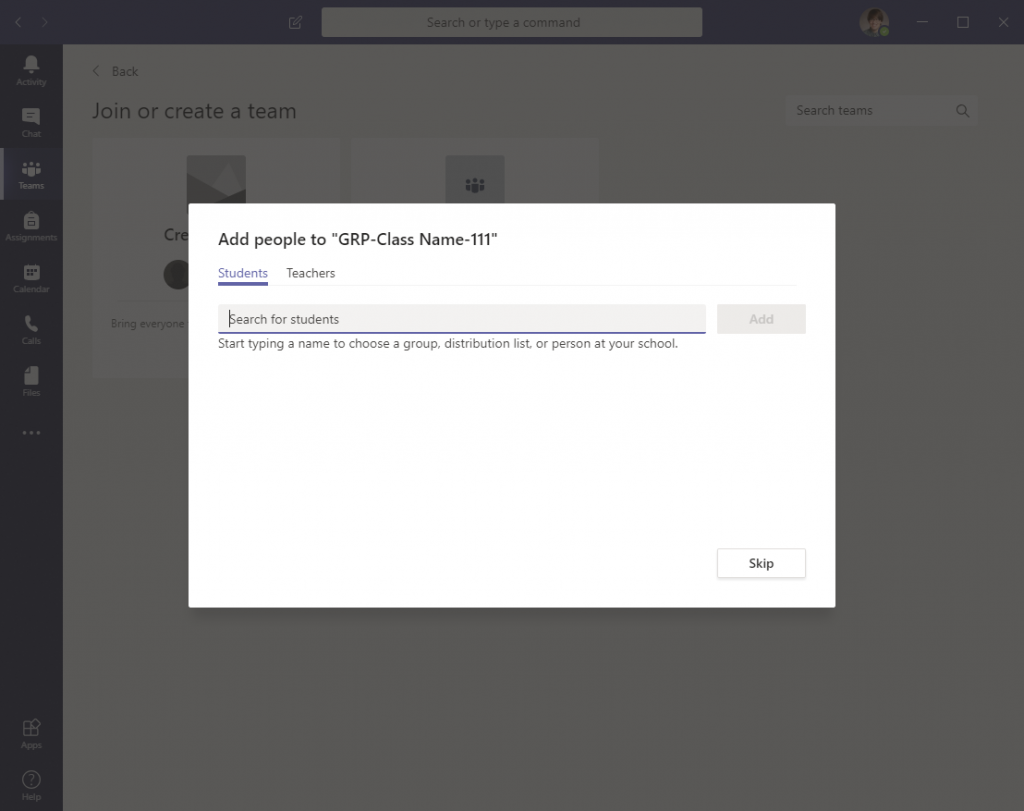
It will give you the option to add students and teachers to the Team – you don’t have to do this, but if you have co-teachers it can be helpful to add them now.
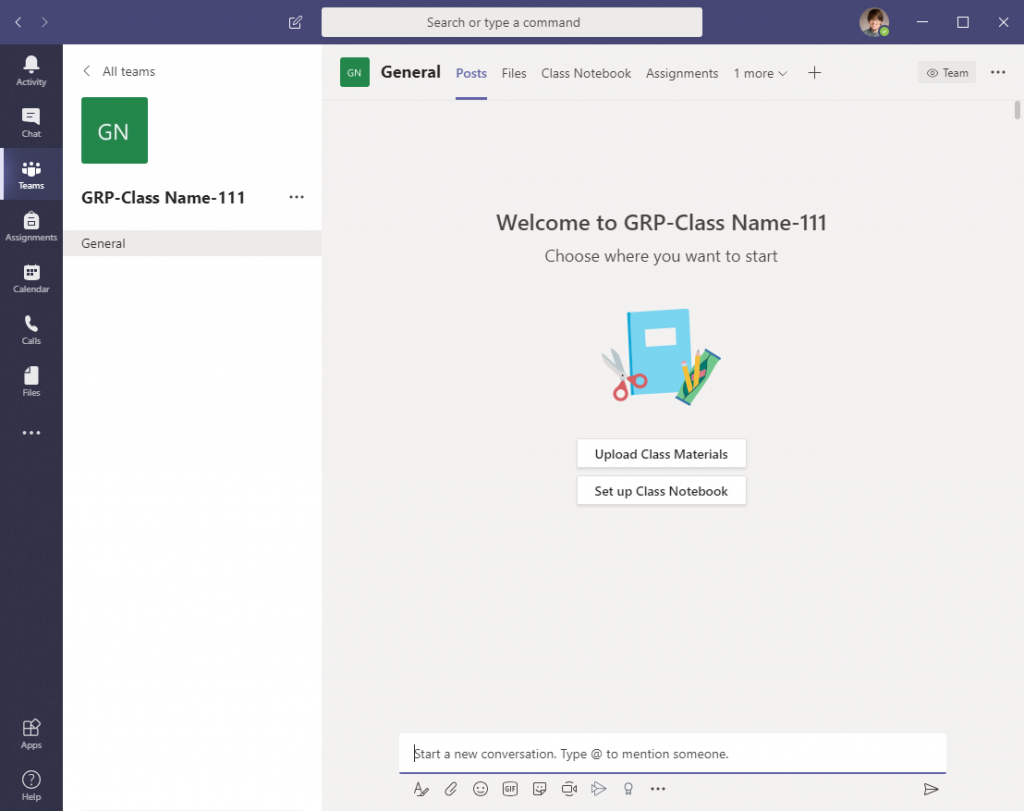
Now your team is created and you can add content to it! Typing into the chat bar can allow you to start conversations, or you can drag documents into the team to share them with your classmates.
In order to allow students to self-enroll, you can grab a link to the team.
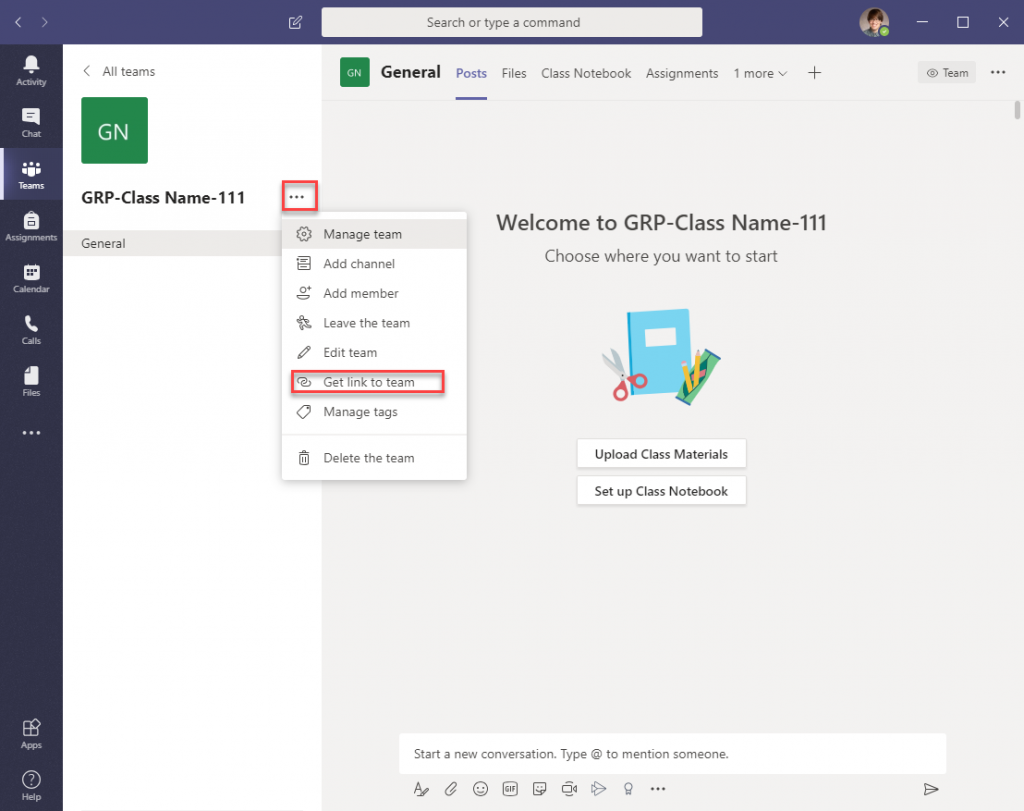
To grab the link, simply click on the three dots next to your team name and then click on “Get link to team”.
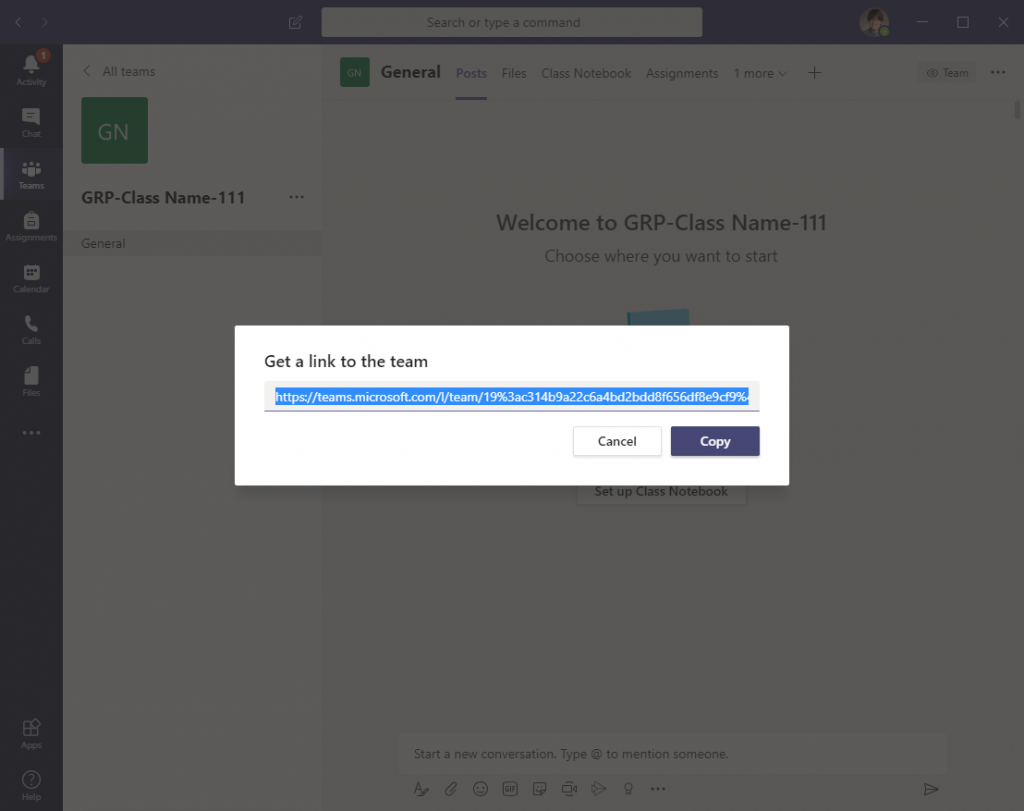
You can copy this link and send it to your students, who can click it to join the team and the discussion. Once they click the link, you will receive a notification to approve their entry to the team.
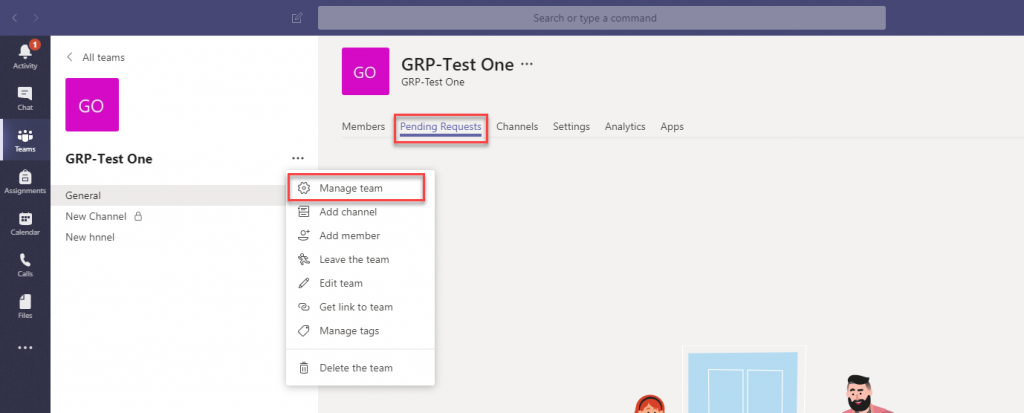
In order to accept students, you’ll need to click on the three dots next to your Team name, and then click the “Manage team” option. Then, click on “Pending Requests” to view students who you need to accept into your Class Team.
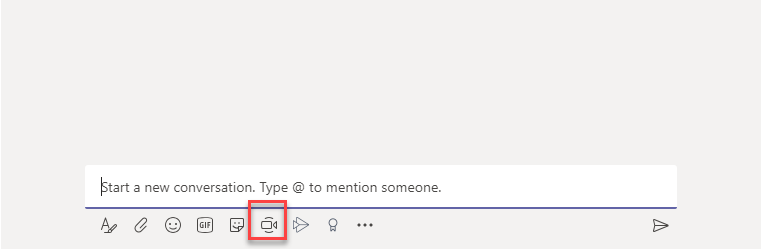
In order to start a video or audio meeting, click on the camera icon underneath the conversation bar.

A screen will pop up where you can turn your camera on or off, and choose whether you want to start the meeting now or schedule it for later. When you’re done making sure you’re framed up appropriately, you can start the meeting and students will be prompted to join in!
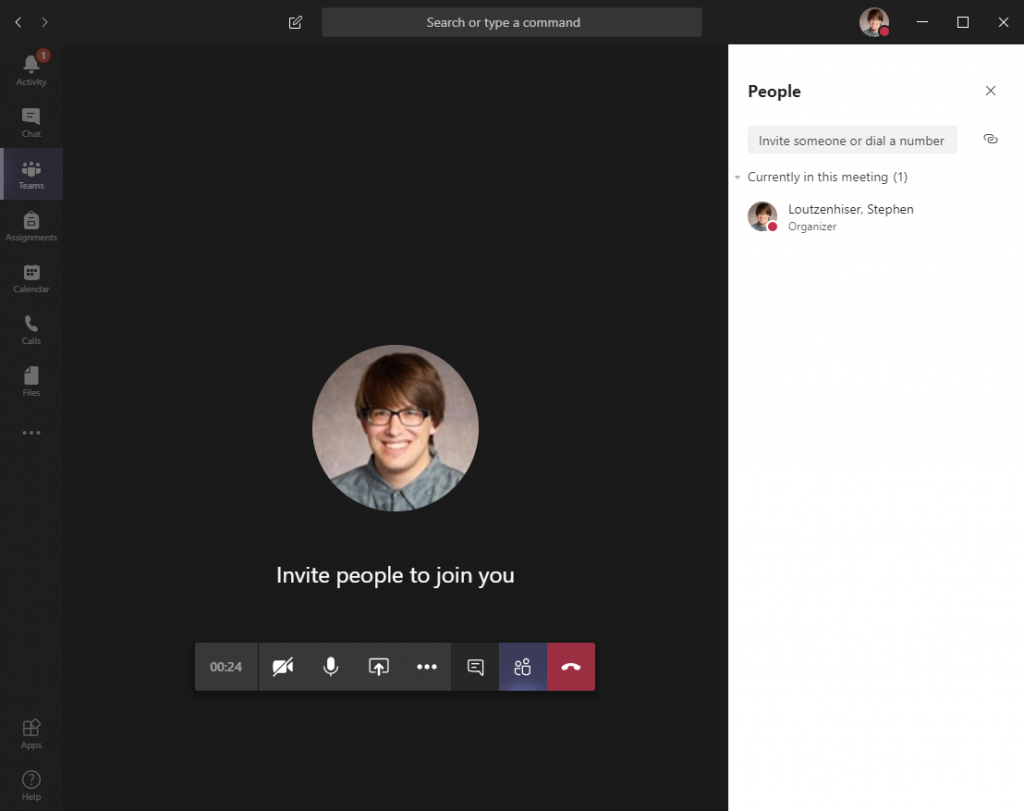
This is a great way to keep students engages in a synchronous meeting.
Those are the basics of getting started with Teams. Microsoft has a lot more documentation on the program, including a playlist of Teams training videos that may be useful to anyone looking to delve deeper into the functionality and potential of using this tool. If you have any questions, feel free to email ATSI@up.edu for more information.
How would I go about recording a Teams meeting? Is it possible to record within Teams, or should I plan to use TechSmith Relay, etc., to record it?
Hi Heidi, great question! You can record the meeting directly in Teams and it would be available for attendees on the same Team automatically. You can also download the file later if you need to share it publicly:
https://support.office.com/en-us/article/record-a-meeting-in-teams-34dfbe7f-b07d-4a27-b4c6-de62f1348c24
Thanks, Ben! FYI to anyone else who comes to this page, I found another page of Teams support that includes information about recording (which I did not see on the “training videos” page linked above): https://support.office.com/en-us/teams.
I may have done something wrong, but I *think* that students who click on team link *won’t* automatically join the team. I’m getting join requests from students, which I then need to accept.
It looks like the solution to this (little) problem might be a Team Code. It I give students a Team Code (acquired in Settings), in addition to the link, will it be obvious to students what to do with it? Thanks in advance for your help!
Hi Todd,
You’re right! Unfortunately that step got omitted, the post will be updated with that instruction included, but you will need to manually approve people unless you give them the Team Code – you’d need to inform the students that they would need to “join or create a team”, and then enter in the code in the appropriate section on that page. It may not be as directly apparent as clicking a link, but it could be a good option with that basic additional instruction.
This page has been updated to include that extra step of instructors needing to approve students.
Two questions:
1. Do we have to have passwords for our students? When I have created teams and added the emails of participants, and then put the emails in as “required attendees,”, those people could just click “join” meeting. Will this work?
2. Can I write on the board (or my tablet) and share with my classes as I lecture with Teams? Teams on the tablet doesn’t seem to work well with the function I need to teach a class.
Thanks!
1. Yes, that would work – but you may experience some loss of functionality, like an inability for students to access the chat or to easily get access to recordings of the Teams meetings.
2. Teams on a tablet does allow you to share your screen – you’d just need to click the “Share” button, and then click on the screen option, then it should cast your tablet screen.
I created a class in Teams, sent students the link, and approved three requests to join. I have more requests to join- I see them in Outlook and my feed on Teams- but the “pending” tab has disappeared from my screen! So I have no way to approve the requests. What should I do?
I’ve seen this once or twice before – I’m not sure what causes it but usually it seems to go away on its own. Alternatively, I’d try refreshing the application (closing and re-opening it) or checking in a different format (going to a browser to see).
I read the Microsoft instructions on how to share my screen with members of my team, but don’t see the icon shown in the tutorial. Is this available on in certain version?
Thanks!
Generally the desktop version will be the most reliable in having all of the features – I would utilize the desktop version if you can, and it should have all the options.
In Teams, is it possible for groups of students (in a channel) to give a presentation to the whole class team using a PowerPoint?
Yes – you would need to make them presenters (opening the participants menu, right-clicking on a user in question, and clicking the “Make Presenter” option), and then they would have the same screen-sharing capabilities as you.
I am going to be running a edtech intro for the 2020 cohort of MAT students at school of ed. I’m guessing maybe 25-30 students. In the past, I’ve managed it live via this google site https://sites.google.com/view/up-edtechcamp/home. Most of the session is teams exploring an assigned edtech app and reporting back to full group.
I’m guessing this summer it will be online rather than face to face. And I’d like to see if I can use Teams to “recreate’ the model.
Using Teams can I easily set up small workgroups of 2-3 students who could collaborate “virtually” and share their work with the full group?
The session will last 3 hours and I’d like to have the small teams collaborate with an edtech tool – figure it out and then share their impressions and something they made with the full group of 30 students.