Introduction
If you are sharing a lot of files and documents in your Moodle course, you may want to utilize Moodle’s folder resource to organize them. This makes your course easier to navigate and allows your students to find and understand the resources they need to learn your material.
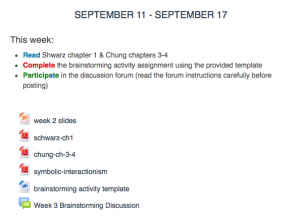
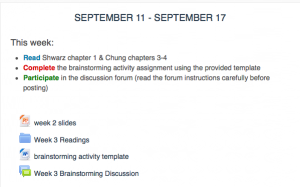
As an example of how you might use folders, see the screenshot below. The lefthand module contains a PowerPoint file, a Word file, and 3 PDF files. On the right, the PDFs have been consolidated into a Folder resource labeled “Week 3 reading”.
Step 1
Turn editing on by either:
- Click the gear icon, then choose Turn editing on from the Course administration menu OR
- Alternatively, just click the Turn editing on button.

Step 2
In the section where you’d like to add content, click Add Activity/Resource.

Step 3
On the folder settings page, fill in the Name and optionally the Description for your folder. You can also choose if you want the folder contents to appear inline on the course page, or on a separate page for the folder.
To add your files to the folder, drag and drop files into the upload area.

Results
If you chose to have the folder contents display on a separate page, students can click on the Folder resource to access the file contents.
If you chose to display the folder contents inline, the students will see the folder and its contents on the course page.


