Introduction
The easiest way to email students in your class is to use the Quickmail block. Here are some features of Quickmail:
- Easily select email recipients from your course
- Add file attachments
- Receive a copy of sent emails
- View a history of emails sent with Quickmail
Step 1
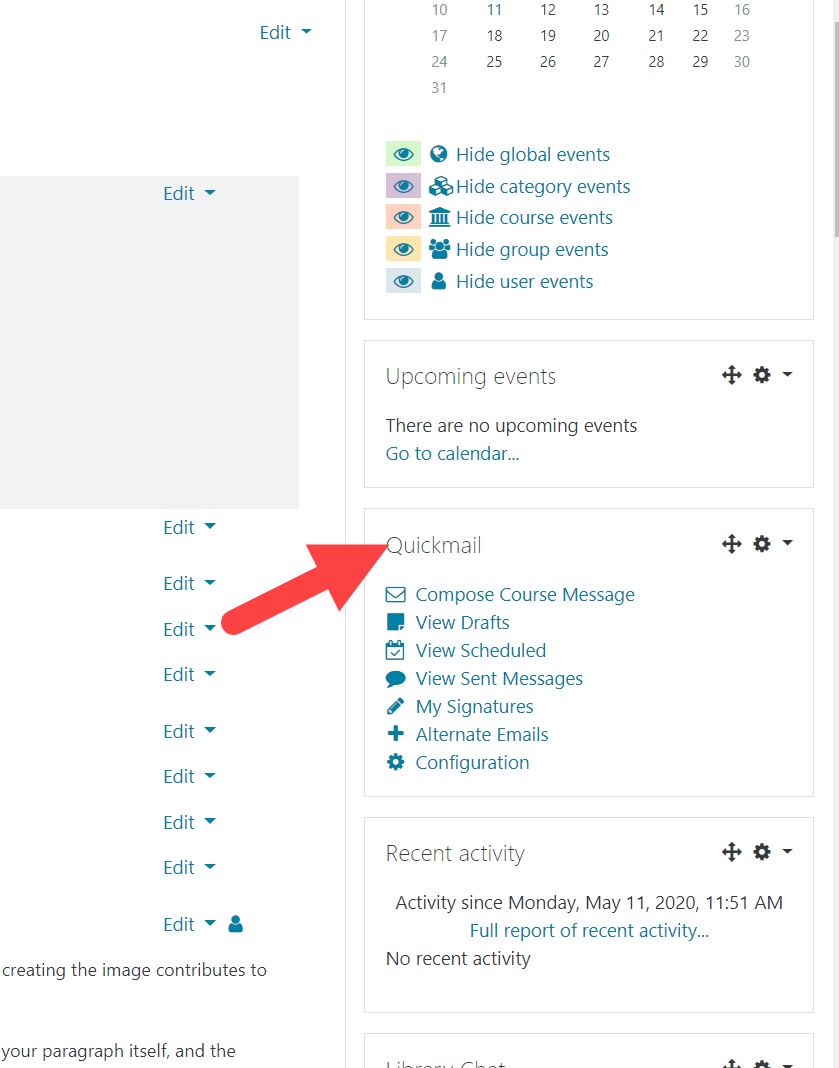
Find the Quickmail block on the right-hand side of your course. By default, it will be located in the right-hand column of blocks. (You may need to scroll down a bit to locate it.)
Step 2
Within the block, you can do a number of things including Compose Course Message, edit Signatures, View Drafts, and View Sent or Scheduled messages.
- Compose Course Message – this is what you will use to send an email to your students
- Signatures – Quickmail allows you create signatures for your emails. These signatures are available in all of your moodle courses when you use Quickmail. Using this feature is optional.
- View Drafts – If you choose to save a draft email instead of sending it, this is where you would view it and other drafts you have saved.
- View Sent or View Scheduled – Quickmail keeps a history of every message you send or schedule to be sent at a future date. This history is saved individually for each course.
Step 3
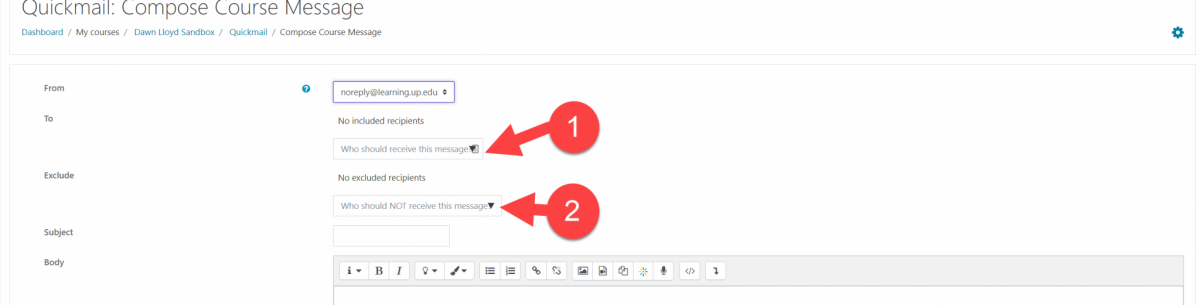
To start your new message, click Compose Course Message. The following screen allows you to choose which students in your course to send an email to.
In the To field, click the drop down arrow to select your intended recipients (1). Moodle will give you several options including adding all of the students in your class, groups that you have created within your class, or individual students.
If there are one or more recipients in the recipient group you selected whom you do not want to receive the message for any reason, you can select those individuals from the Exclude field (2).
Step 4
Give your email a subject and compose your email in the body box the same as you would a regular email.
If you are sending to a group of your students and want to be able to personalize what each receives, you can type in one of the supported user data fields that corresponds to the information you want to add (the list of options appears below the text box for the body of your message).
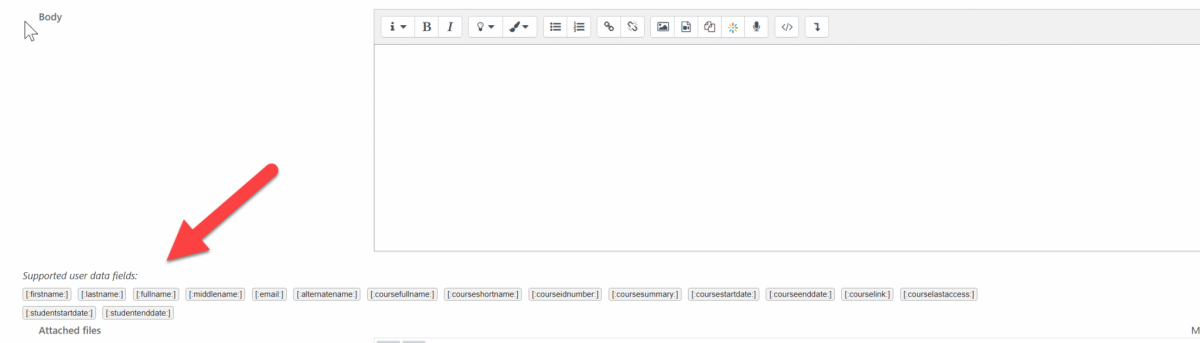
For example, if you want each student in your class to receive a message that says “Hi” with their first name, type the following on the first line of your message:
Hi [:firstname:],
Each student will then get a message that starts with their name, such as:
Hi Jane,
You can also use user data fields to add other information such as your full course name or course short code that are difficult or time consuming to add manually.
Step 5
If you have files you need to send, you can attach files in quickmail the same way you can a regular email (NOTE: file sizes for Quickmail messages are the same as your course upload limit even though it says unlimited– in most cases this is 20MB).
If you created a signature which you would like to use, you can also select it at this time.
Step 6
As you finalize your message, you can decide if you want to send it now or at a future date. If you wish to schedule it for a future date, click the Enable box next to Send at and set the date and time according to when you would like to send your message (1).
If you would like to have a copy of the email sent to your email address, make sure Yes is selected next to Receive a send report (2).

Step 7
Click Send Email to send out your email to the selected recipients. If you need to come back to your message for additional editing before sending or scheduling it, you can click Save Draft instead.
F.A.Q.s
Is the message sent through Moodle mail?
Quickmail sends messages using your email address, to the recipient’s email address; it will look like any other normal email. When someone responds to the email, it will go directly to your email inbox. Quickmail is a one-way communication tool that makes sending emails to your class much easier. Once the initial message has been sent out, any further replies will be done via your normal email program (Outlook, Office365, etc.).
If I send a message to multiple students, can they see everyone else that was sent the email?
When sending an email to multiple recipients, each recipient is treated as a BCC (blind carbon copy). That means no, they can’t see anyone else that was sent the email—they will see the email as only having been sent to themselves.
Help! My students aren’t getting my email sent through quickmail
If students are using default O365 Focused Inbox mail settings, Quickmail messages often go into their “Other” email list instead of their “Focused” inbox list. Please ask students to check their “Other” email tab and if needed right-click their Moodle mail and select “Always move to focused inbox.” For more on Focused Inbox see Microsoft’s Focused Inbox support page.
In some cases, students may need to check in their Junk email folders.