The Waiting Room feature allows you to control when students or other participants join your Zoom meeting. It is automatically enabled for all new meetings, and must be disabled manually when scheduling a meeting or while in the meeting.
Managing the Waiting Room
When someone joins a meeting with a waiting room enabled, they will see a message that they are in a waiting room, and the host will receive notifications as they enter.

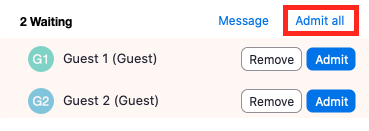
Click on “See Waiting Room” to see who is in the room. On the right hand side, you will be able to admit individuals, or all those waiting by clicking the “Admit” or “Admit all” buttons.


Once admitted, they will be able to see and talk with everyone in the Zoom meeting.
Disabling or Changing Waiting Room Settings
Sign into the Zoom web portal, and navigate to Settings, then Security.

If you want to disable the waiting room, click on the blue toggle button to the right:

To change who goes into the waiting room, click on “Edit options”.


Here, you can select if everyone goes into the waiting room, or everyone not in your account (i.e. they are not logged into a UP email address). You can also choose to allow people with UP email addresses can admit people from the waiting room.
Remember, if a student or participant joins without logging into their UP zoom account, they will still go into the waiting room, so encourage them to log in if they want to avoid that!